DIFF short strategy: sellers suddenly step up to the price
The idea
ASK 1.5 shows how much money is waiting to sell right next to the price. DIFF 8B-1.5A shows how far buyers within 8% outweigh those nearby sellers. While ASK 1.5 stays lower, there are few sellers near the price compared with the buyers' cushion.
The signal appears when ASK 1.5 jumps and reaches DIFF 8B-1.5A. Sellers suddenly put as much near the price as the whole buyers' cushion. The three other DIFF lines confirm it isn't noise at one depth: on the same candle the book jolts at several depths at once.
Setup
Every pane is computed for TOTAL: on the Arguments tab, set Coin type to TOTAL.
| Pane | Lines |
|---|---|
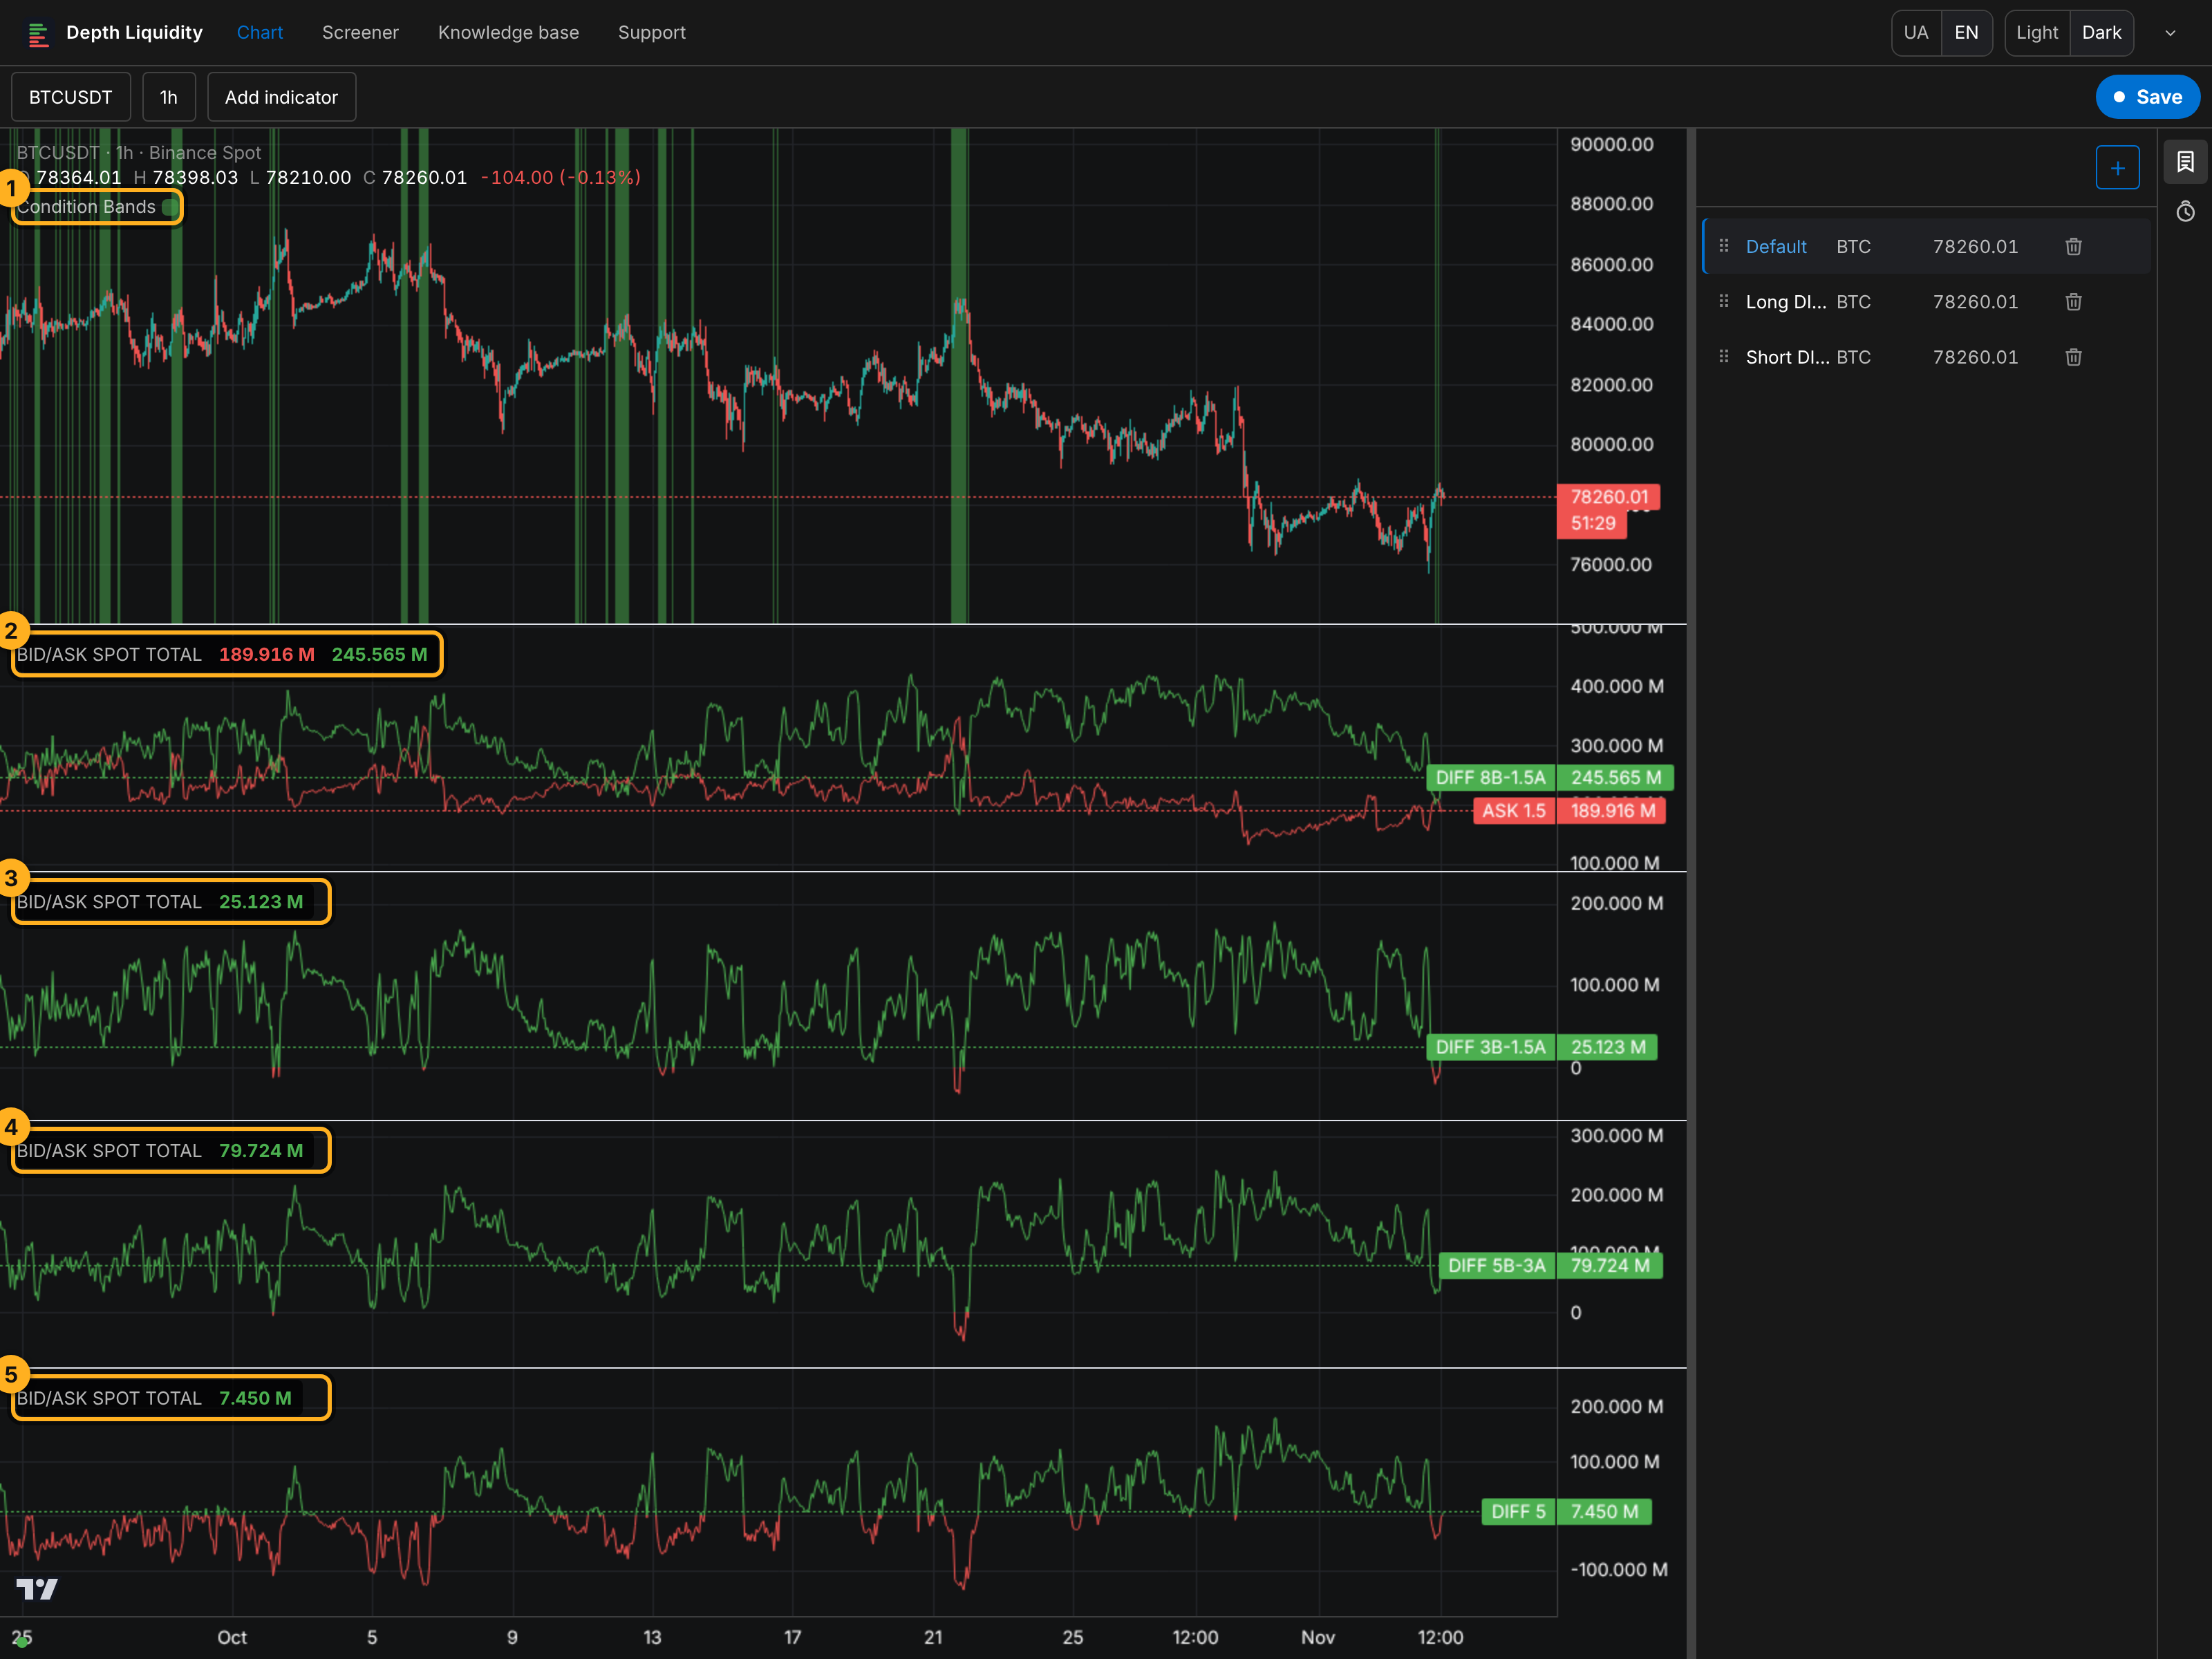
| 1 | ASK 1.5 and DIFF 8B-1.5A on one scale |
| 2 | DIFF 3B-1.5A |
| 3 | DIFF 5B-3A |
| 4 | DIFF 5 |
DIFF 5 is in the ready-made list. DIFF 8B-1.5A, 3B-1.5A and 5B-3A you build yourself:
- Add indicator → BID/ASK, Coin type = TOTAL.
- On the Style tab, untick BID 3 and ASK 3.
- For pane 1, tick ASK 1.5 (1). At the bottom of the tab, pick BID 8 and ASK 1.5 and click Add to get DIFF 8B-1.5A (2).
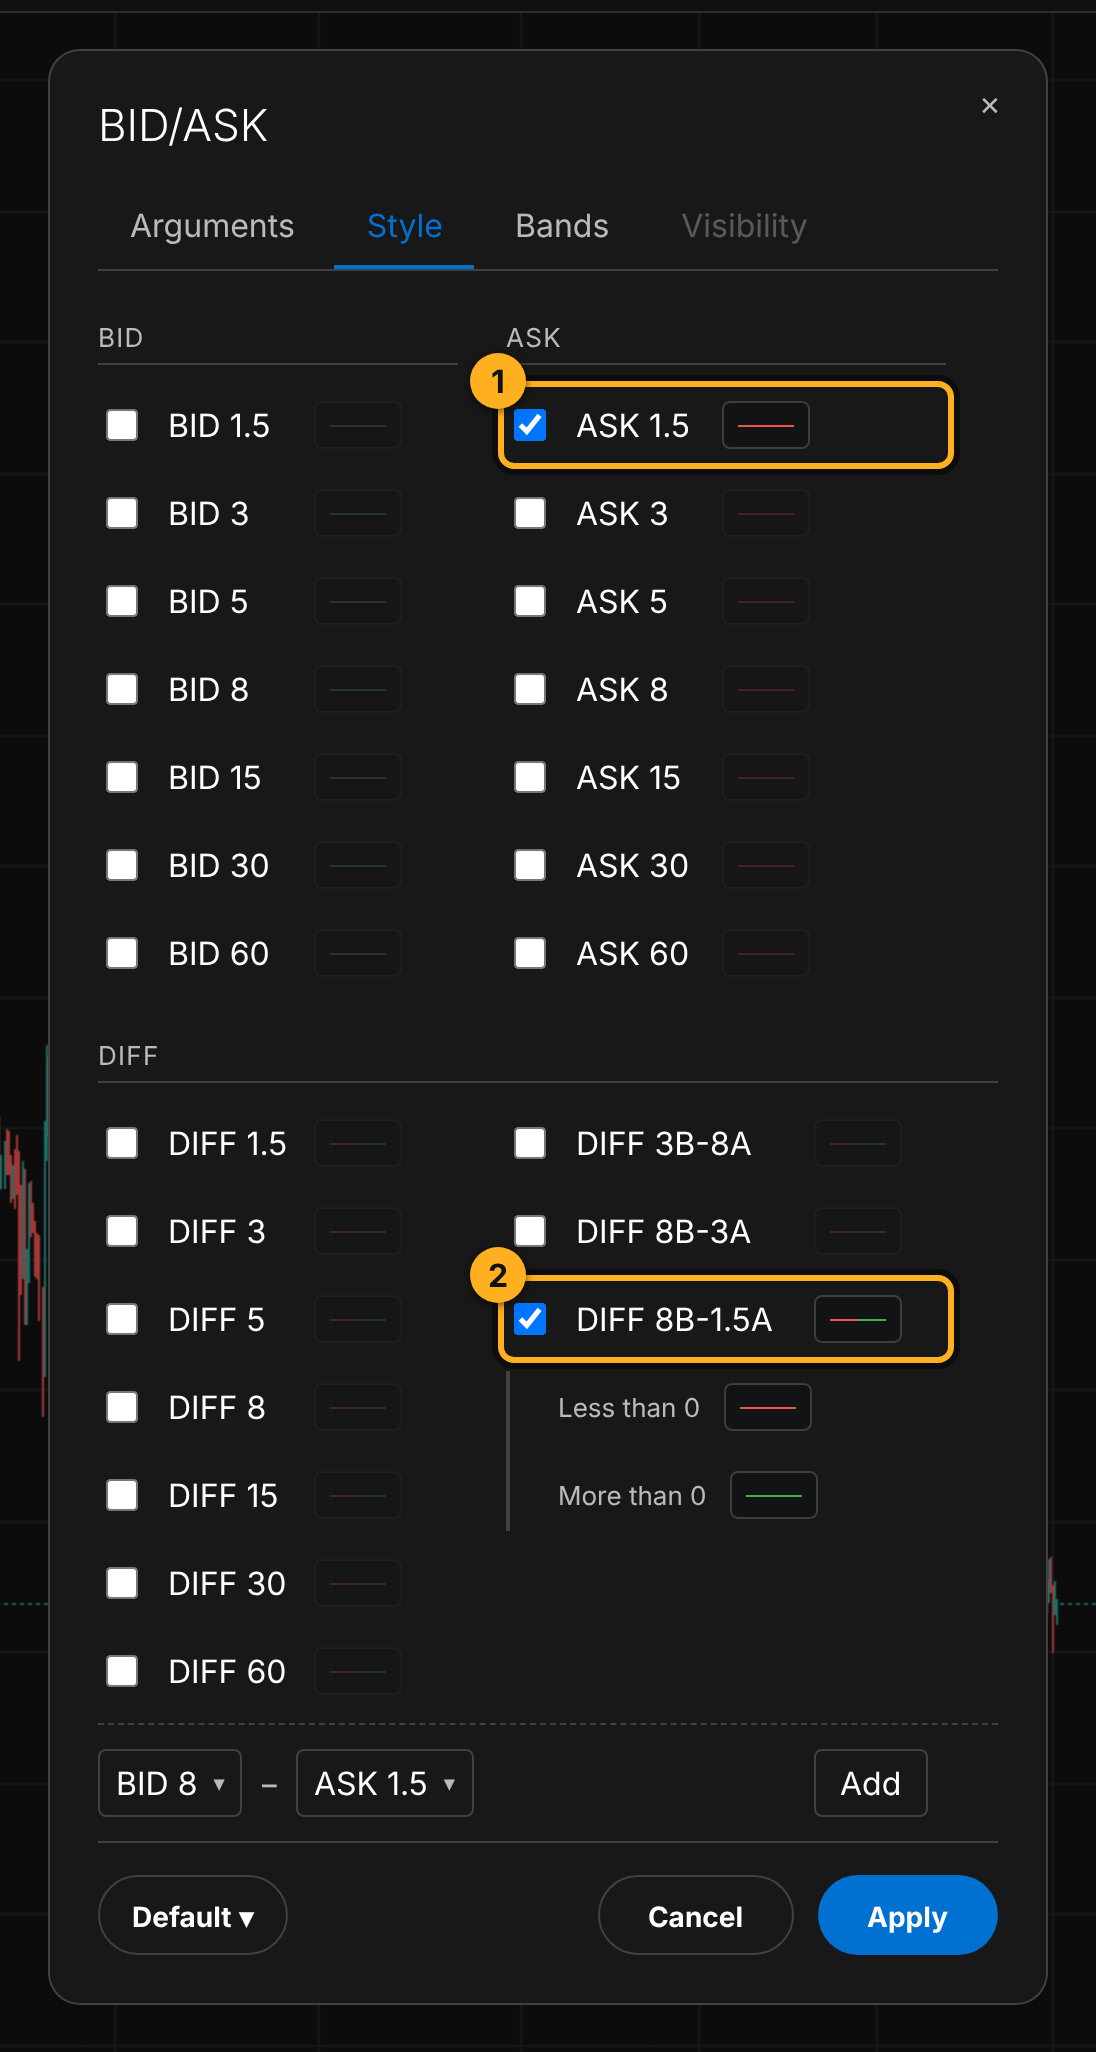
1 The ASK 1.5 line. 2 A custom DIFF 8B-1.5A line, built with Add at the bottom of the tab. - Click Apply. Add panes 2–4 the same way, one line each.
ASK 1.5 and DIFF 8B-1.5A have to share one pane. That puts them on one scale, and you see right away when ASK 1.5 reaches DIFF 8B-1.5A.
Entry checklist
On a closed candle, check:
- ASK 1.5 in pane 1 jumped up and reached or crossed DIFF 8B-1.5A;
- on the same candle, DIFF 3B-1.5A spikes up;
- on the same candle, DIFF 5B-3A spikes up;
- on the same candle, DIFF 5 spikes up.
You can highlight the first item with Condition Bands. One condition, on TOTAL: ASK 1.5 >= the difference BID 8 − ASK 1.5.
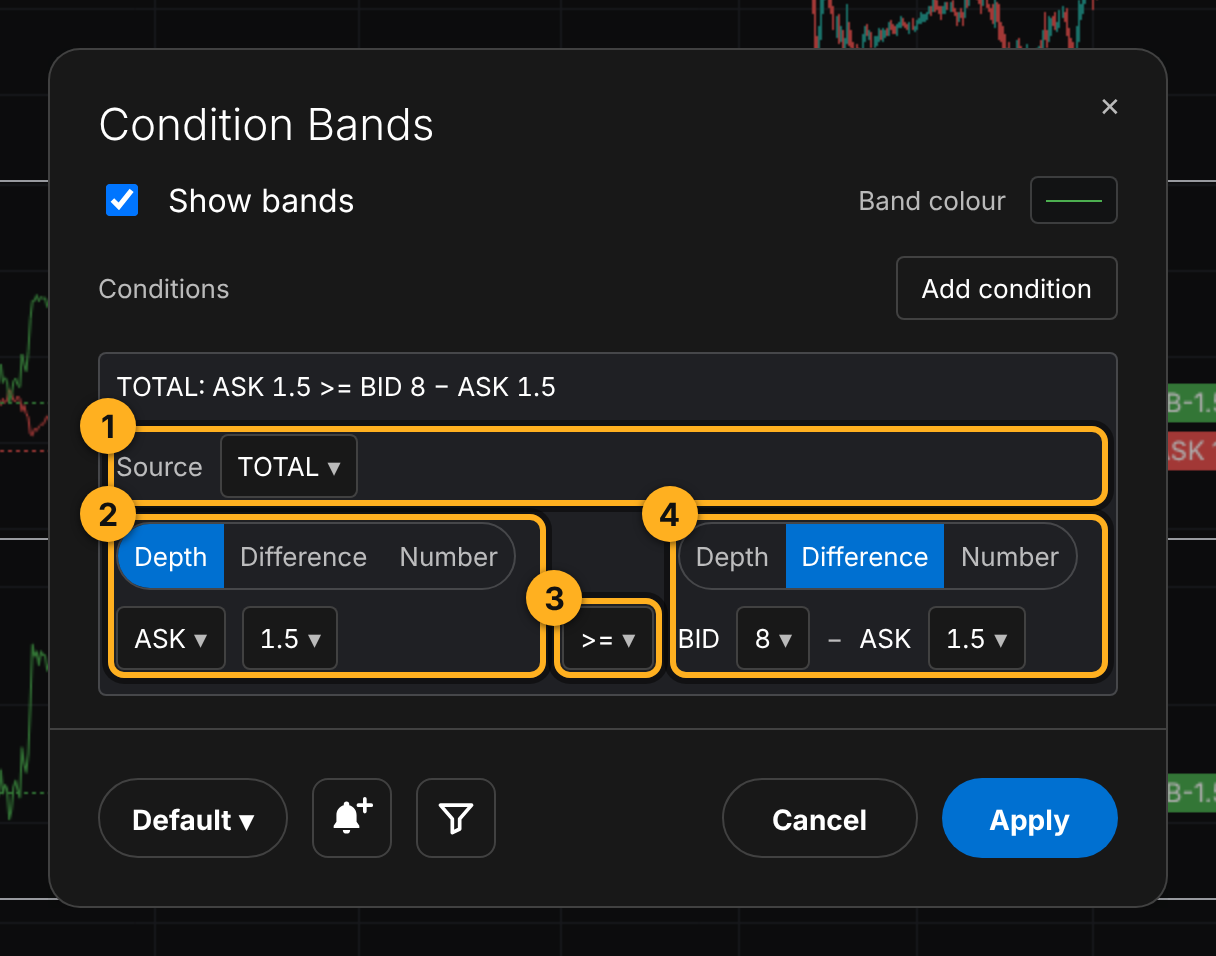
>=. 4 Right side, Difference BID 8 − ASK 1.5.Condition Bands can't express the spikes of the three DIFF lines: a condition compares values on one candle, while a spike only shows against the neighbouring ones. So the bands mark candidates, and you check the spikes by eye on panes 2–4.
Exit
The strategy describes the entry. Where to take profit and where to put a stop is your call, based on your own risk.
What it looks like on history
On the screenshot above there are many bands early in the month and few at the end. It shows plainly that the one Condition Bands condition is not a signal by itself: most bands drop out once you check the spikes of the three DIFF lines. Go through the history of your coin and timeframe and count how many times all four items lined up and what price did next.
When it doesn't work
- A strong uptrend. A lot of sellers can suddenly show up near the price, but buyers eat them quickly and price keeps going up.
- A coin with a mind of its own. The signal is computed across the market. A coin with its own news or a thin book may not follow the market.
- A one-candle burst with no confirmation. If ASK 1.5 spikes but the DIFF lines don't respond, you have half a signal.
Check it and get an alert
- Check it on history. Condition Bands shades every past candle where ASK 1.5 reached DIFF 8B-1.5A. Go through them and see where the three DIFF spikes lined up.
- Get an alert. Create alert in the Condition Bands window opens a Telegram alert form with the TOTAL condition. The message arrives when the first part of the signal fires, and you check the DIFF spikes on the chart.
- The Screener won't help here. A TOTAL condition is the same for every coin, so the Screener shows either every coin or none.
Ready-made preset
To skip building the panes by hand, open the ready-made preset. It loads a chart with all four TOTAL panes and Condition Bands set up as in this article. You can switch the coin as usual and the settings stay.
Open on the chartNot financial advice.